
Introduction
One of the most powerful features of the Spring ecosystem is its ability to handle cross-cutting concerns through annotations. Whether you are using @Service, @RestController, or @Transactional, you are benefiting from declarative programming. However, there comes a time in every senior developer’s career when the built-in annotations aren’t enough. In this guide, I will walk you through a practical spring boot custom annotation example that solves a real-world problem: measuring method execution time without polluting your business logic.
If you are new to the framework, I recommend starting with my spring boot for beginners introduction to get your environment ready. For those ready to dive deep, we are going to use Aspect-Oriented Programming (AOP) to make our custom annotation come to life.
Prerequisites
Before we jump into the code, ensure you have the following setup in your local environment:
- JDK 17 or higher (I’m using OpenJDK 21 for this build).
- Maven or Gradle (we will use Maven for our dependency management).
- Spring Boot 3.x.
- The
spring-boot-starter-aopdependency in yourpom.xml.
<dependency>
    <groupId>org.springframework.boot</groupId>
    <artifactId>spring-boot-starter-aop</artifactId>
</dependency>
Step 1: Define the Annotation Interface
To create a custom annotation, we use the @interface keyword. We also need to specify two critical meta-annotations: @Target and @Retention. For our spring boot custom annotation example, we want to apply it to methods and ensure it is available at runtime.
@Target(ElementType.METHOD)
@Retention(RetentionPolicy.RUNTIME)
public @interface LogExecutionTime {
    String value() default "Default Task";
}
Here, ElementType.METHOD means it can only be placed on methods, and RetentionPolicy.RUNTIME ensures the Spring container can read it during application execution.
Step 2: Implementing the Logic with AOP
An annotation by itself is just metadata; it doesn’t do anything. To give it behavior, we need an Aspect. This is where the magic happens. We will use an @Around advice to intercept the method call, start a timer, execute the method, and then log the duration.
@Aspect
@Component
public class ExecutionTimeAspect {

    @Around("@annotation(logExecutionTime)")
    public Object logExecutionTime(ProceedingJoinPoint joinPoint, LogExecutionTime logExecutionTime) throws Throwable {
        long start = System.currentTimeMillis();

        // This executes the actual method
        Object proceed = joinPoint.proceed();

        long executionTime = System.currentTimeMillis() - start;

        System.out.println(logExecutionTime.value() + " executed in " + executionTime + "ms");
        return proceed;
    }
}
As shown in the logic above, we are leveraging ProceedingJoinPoint to control the execution flow. This is a much cleaner approach than manually adding timers to every service method.
Step 3: Applying Your Custom Annotation
Now that we have our annotation and our aspect, let’s see them in action. I usually apply these to service-layer methods or external API calls where performance tracking is vital. Check out how I’ve implemented it in this mock service:
@Service
public class DataProcessorService {
@LogExecutionTime("Fetching User Data")
public String processData() throws InterruptedException {
Thread.sleep(2000); // Simulating a slow database call
return "Data Processed Successfully";
}
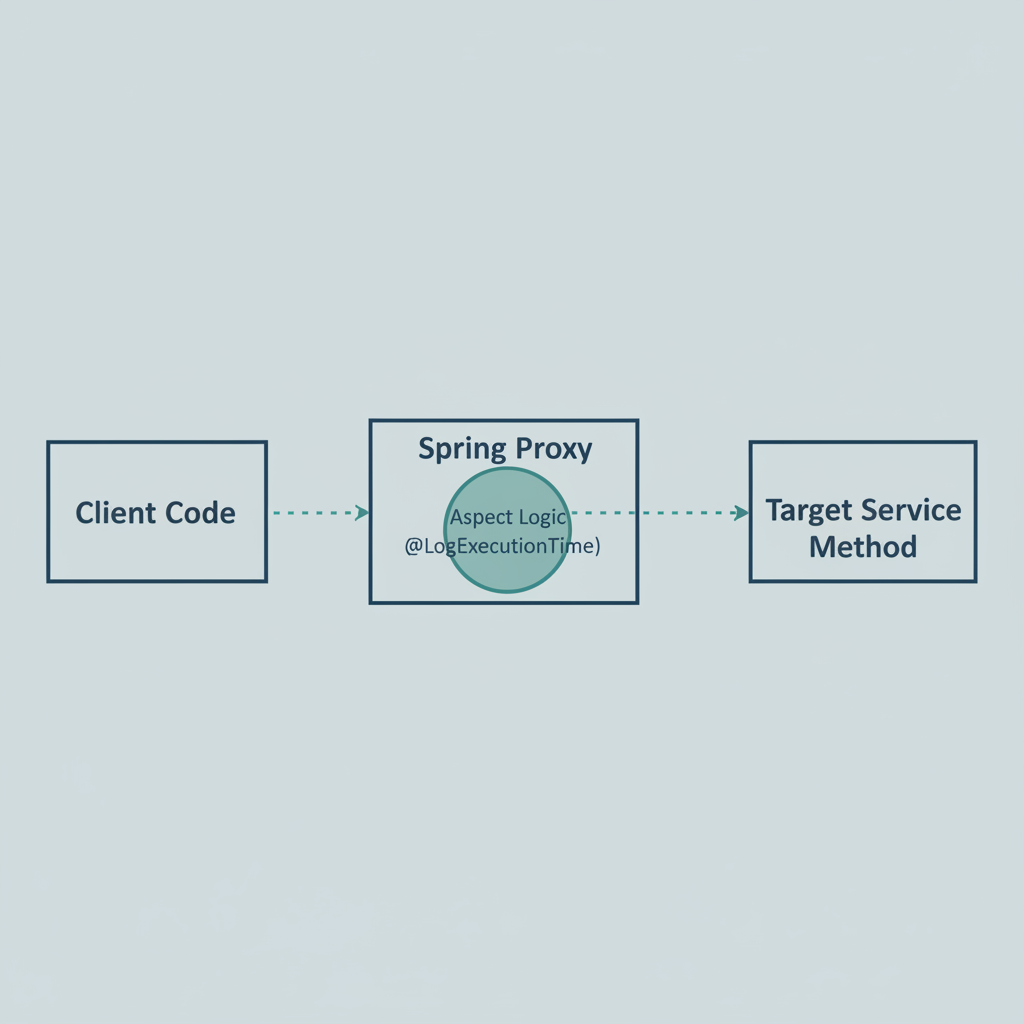
}When you call processData(), Spring creates a proxy. Instead of calling the method directly, it calls our ExecutionTimeAspect first. If you want to see how this fits into a broader logging strategy, read my guide on spring boot logging best practices.
Pro Tips for Custom Annotations
Through my experience building large-scale microservices, I’ve found a few nuances that can trip you up:
- Self-Invocation: If you call a method with a custom annotation from another method within the same class (e.g.,
this.myAnnotatedMethod()), the annotation will not trigger. This is because Spring AOP uses proxies; direct calls bypass the proxy. - Keep it Simple: Don’t over-engineer. If you find yourself passing 10 parameters into an annotation, you might be better off with a standard strategy pattern.
- Visibility: Ensure the methods you annotate are
public. Private methods cannot be proxied by standard Spring AOP.
Troubleshooting Common Issues
If your annotation isn’t firing, check the following:
- Component Scanning: Is your
@Aspectclass inside a package scanned by@SpringBootApplication? If not, Spring won’t see it. - Missing Dependency: Did you include
spring-boot-starter-aop? Without it,@Aspectand@Aroundwon’t be recognized. - Aspect Ordering: If you have multiple aspects (like security and logging), use
@Orderto define which one runs first.
What’s Next?
Once you’ve mastered this spring boot custom annotation example, you can explore more advanced use cases like custom validation annotations (using ConstraintValidator) or integrating with Spring Security to create custom role-based access controls. For performance-sensitive apps, you might even combine these with Spring Actuator to push custom metrics directly to Prometheus.